How To Handle Common Roadside Emergencies Using Your Car Tool Kit
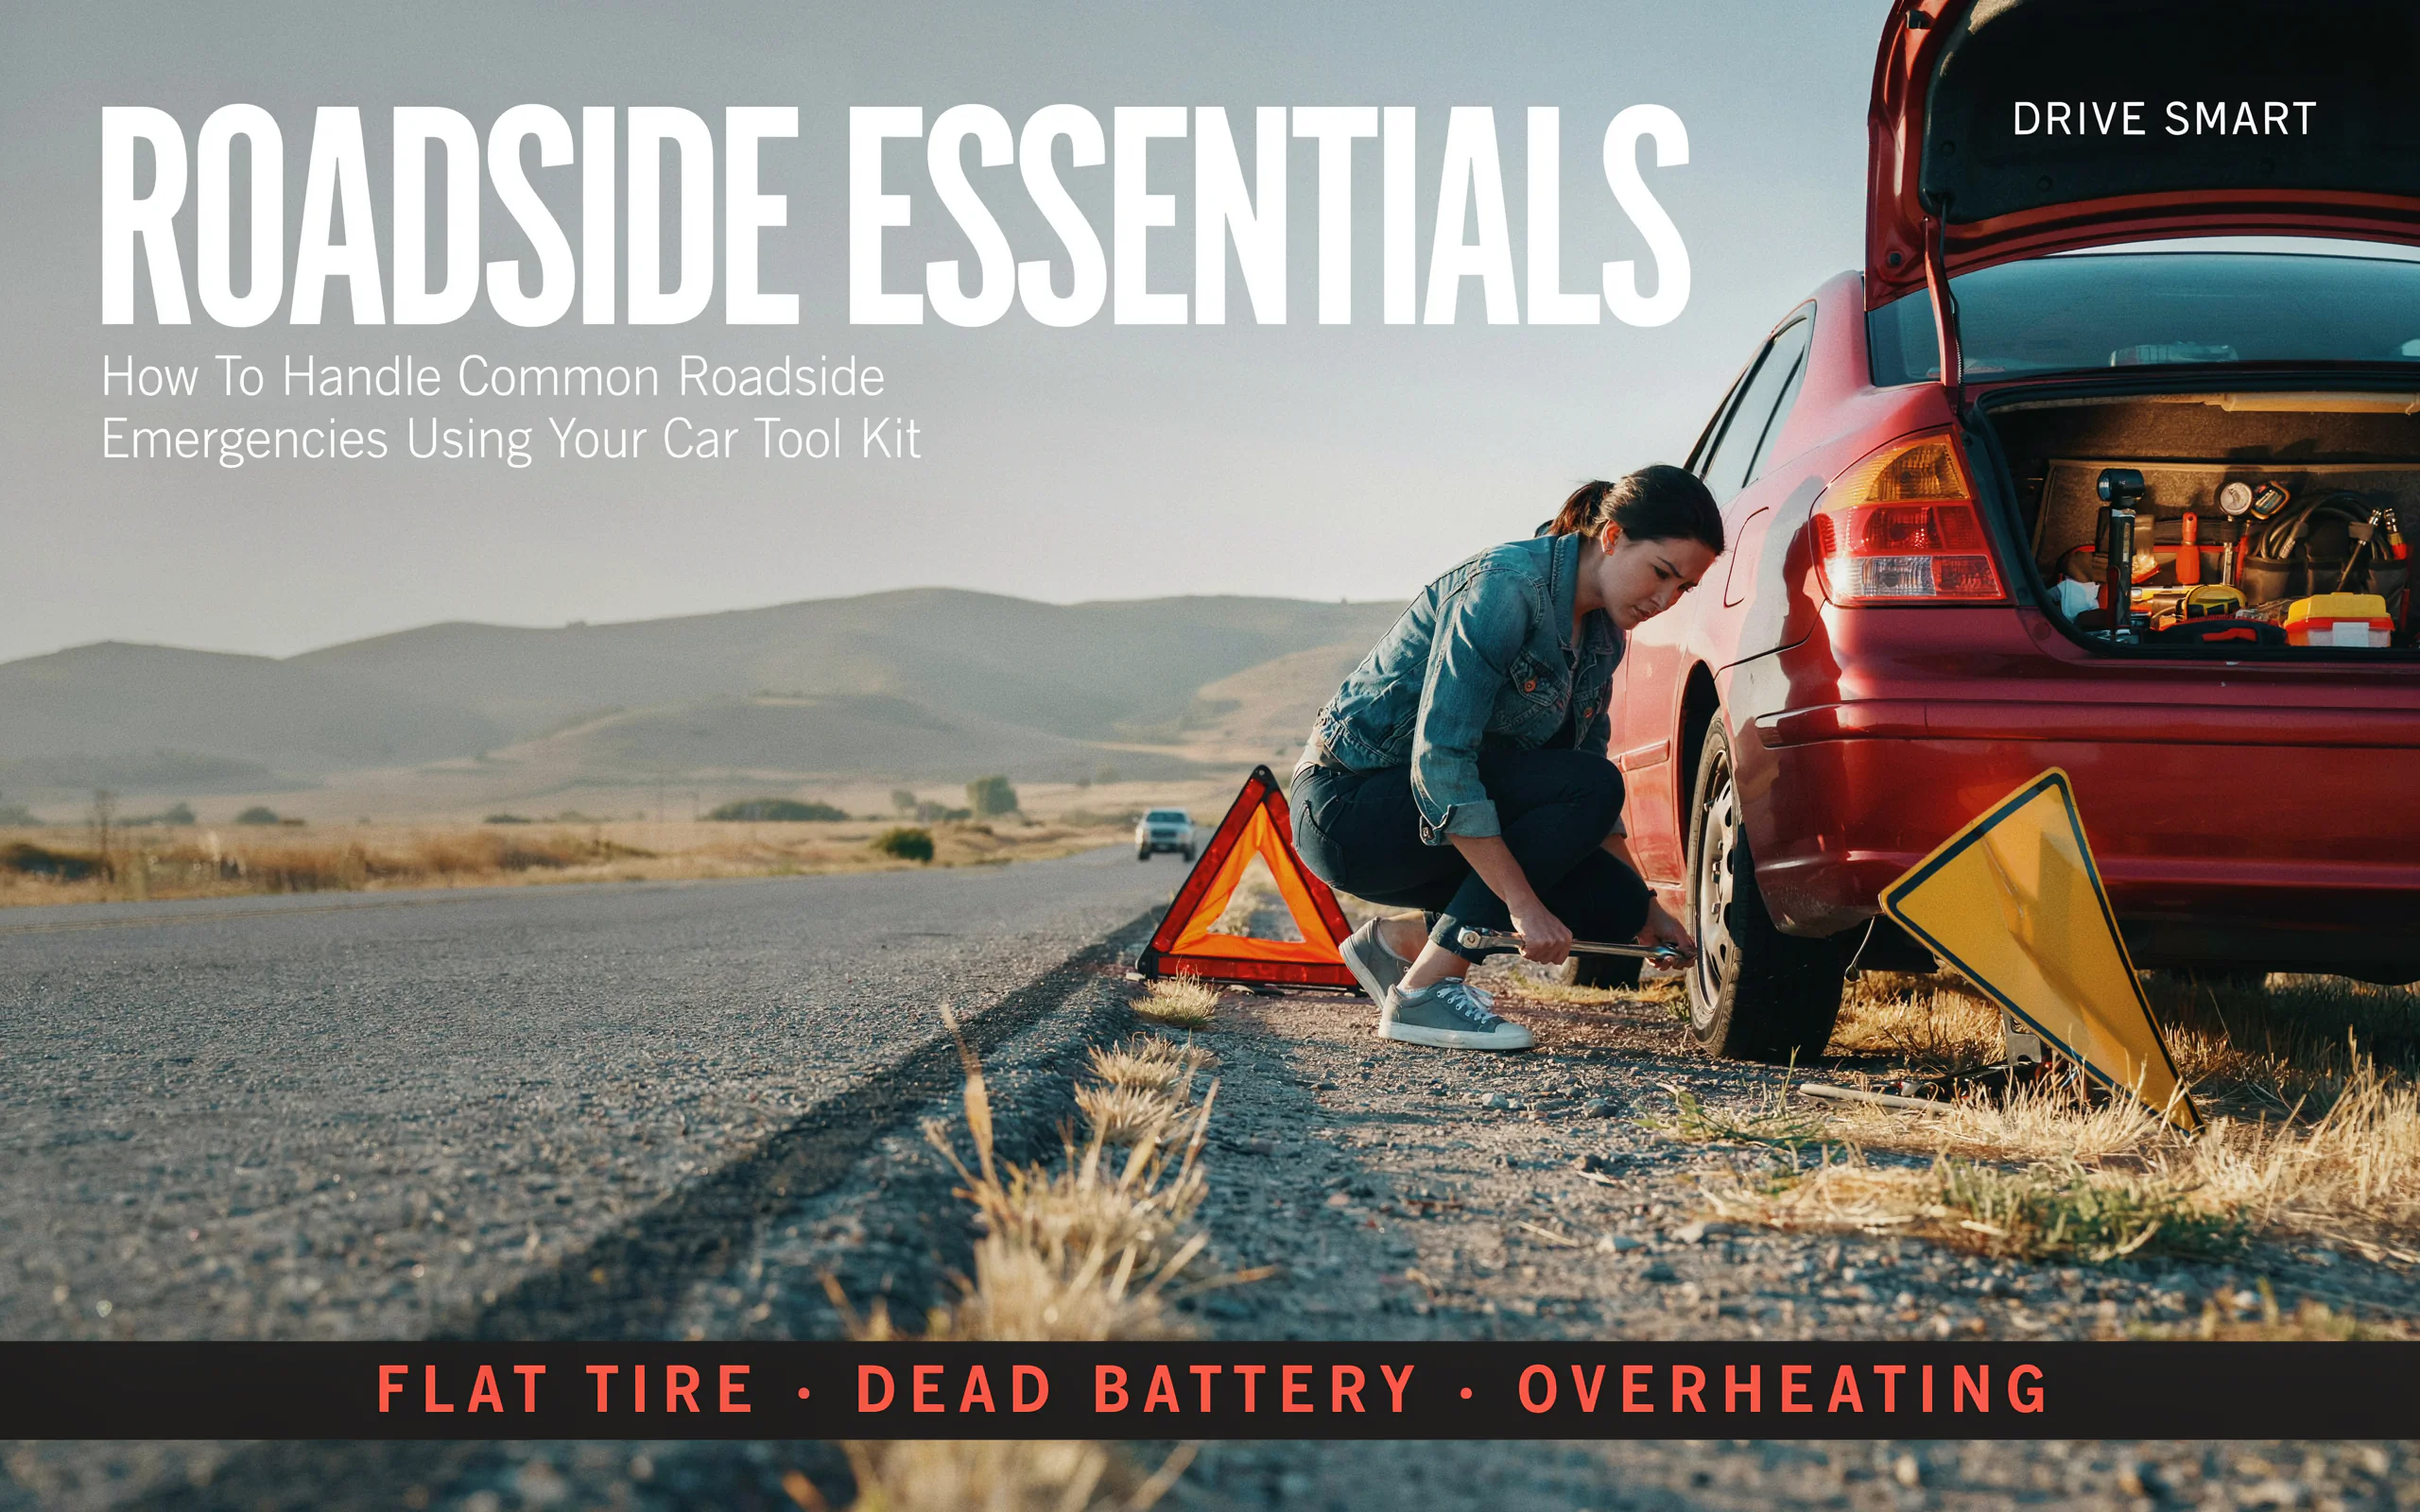
Knowing how to handle common roadside emergencies using your car tool kit can turn a stressful breakdown into a minor delay. This guide covers flat tires, dead batteries, overheating, and more with simple, safe steps.
Picture this. You are driving home after a long day. The sun is setting. Then you hear a strange thump. Your car pulls to one side. You have a flat tire. Or maybe you turn the key one morning, and nothing happens. Just a click. Your battery is dead.
These moments can feel scary. But they do not have to ruin your day. With a little knowledge and the right tools, you can handle many of these problems yourself. The secret is knowing how to handle common roadside emergencies using your car tool kit. This skill saves you time. It saves you money. It also gives you confidence on the road.
Every driver should know basic car repair. You do not need to be a mechanic. You just need to understand a few simple tasks. This article will guide you through the most frequent roadside issues. We will look at what tools you need. We will give you step-by-step instructions. We will also share safety tips to keep you protected.
By the end, you will feel ready for almost anything the road throws at you. Let us get started.
What Should Be in Your Car Tool Kit?
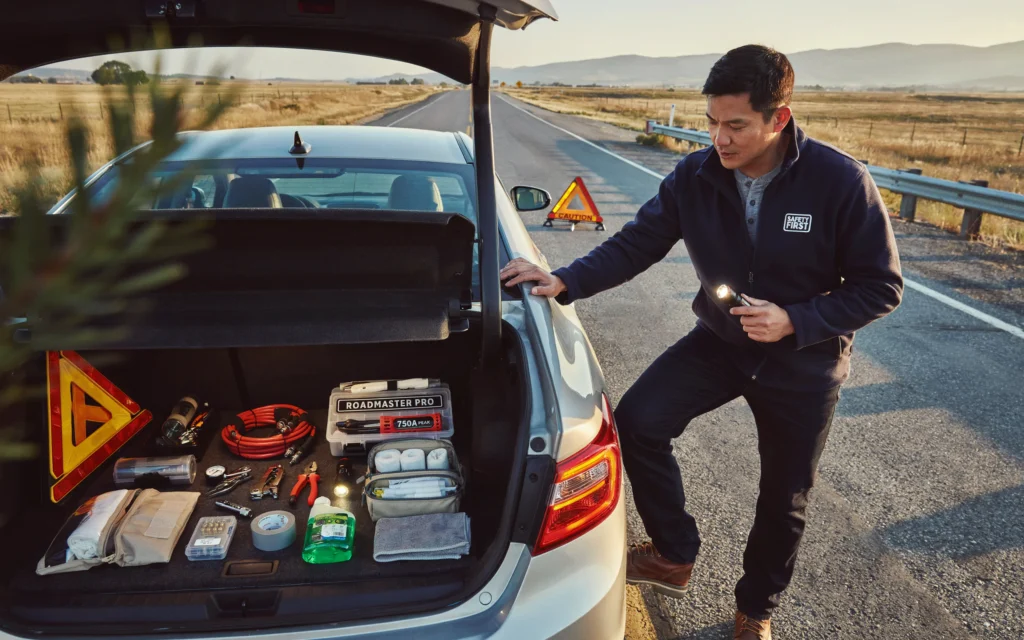
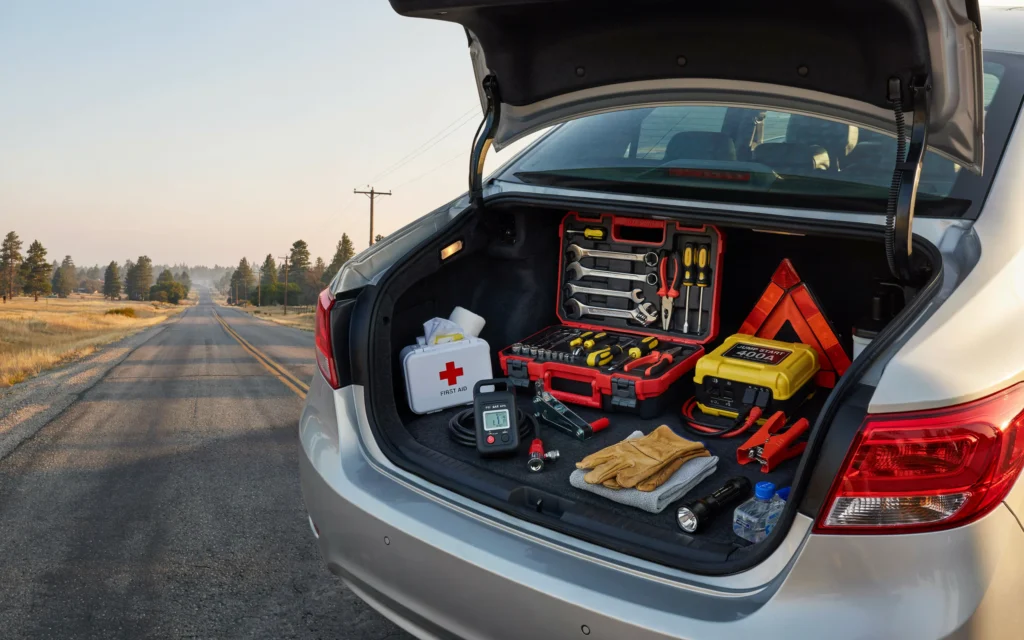
Before you can fix anything, you need the right tools. Many cars come with a basic kit. But these kits are often sparse. You should build a more complete set. This ensures you can handle common roadside emergencies using your car tool kit effectively.
Here is a list of essential items.
| Tool/Item | Purpose |
|---|---|
| Spare Tire | Replaces a flat tire. Check its air pressure regularly. |
| Car Jack | Lifts the car so you can remove the flat tire. |
| Lug Wrench | Removes and tightens the lug nuts on your wheels. |
| Jumper Cables | Starts your car with help from another vehicle. |
| Portable Jump Starter | Starts your car without another vehicle. A great backup. |
| Tire Pressure Gauge | Checks your tire air pressure. |
| Flashlight | Helps you see what you are doing at night. |
| Multi-tool or Basic Wrenches | Tightens loose parts or makes small adjustments. |
| Reflective Triangles or Flares | Warns other drivers that you are stopped. |
| First-Aid Kit | Treats minor cuts or scrapes. |
| Work Gloves | Protects your hands from dirt and sharp edges. |
You can buy a pre-made kit. Or you can build your own. Building your own lets you choose high-quality tools. It also lets you add items specific to your car.
“Preparation is the key to handling any emergency,” says Chris Hohnbaum, AAA Field Operations Manager. “A well-stocked kit gives you options and keeps you safe while you wait for help.”
Keep your kit in the trunk. Make sure it is secure so it does not roll around. Check your spare tire’s pressure every few months. Also, check that your jack and wrench are in good working order. A tool is useless if it breaks when you need it.
Safety First: What to Do in Any Roadside Emergency
Your safety is the most important thing. Before you touch any tool, follow these steps. They will protect you and other drivers.
- Stay Calm. Panic clouds your judgment. Take a deep breath. You have the tools and the knowledge to fix this.
- Pull Over Safely. Move your car as far off the road as possible. Find a flat, stable spot. Avoid soft ground or hills. Turn on your hazard lights immediately.
- Set Up Warning Signals. Place reflective triangles behind your car. Put one about 50 feet back. Put another about 150 feet back. This gives other drivers plenty of warning. If you have flares, use them according to the instructions.
- Put on a Reflective Vest. If you have one, wear it. This makes you much easier to see. It is especially important at night or in bad weather.
- Engage the Parking Brake. This stops your car from rolling. For extra safety, place a heavy rock or wheel wedge behind the tires.
- Call for Help if Needed. If you feel unsafe, or if the problem is too big, call for roadside assistance. Your phone is your lifeline. Keep it charged and with you.
Once you have done these things, you can assess the problem. You can then decide how to proceed. Remember, if you are on a busy highway, it is often safer to stay in your car with your seatbelt on. Wait for professional help.
How to Handle a Flat Tire
A flat tire is the most common roadside problem. It can happen anywhere. Knowing how to handle common roadside emergencies using your car tool kit means knowing how to change a tire.
Step-by-Step Tire Change
- Get Your Tools. Take out your spare tire, jack, and lug wrench. Place them near the flat tire.
- Loosen the Lug Nuts. Use the lug wrench to turn the nuts counter-clockwise. Do not remove them yet. Just break them loose. It is easier to do this while the car is on the ground. The wheel will not spin.
- Position the Jack. Find the jack point. Your owner’s manual shows where this is. It is usually a reinforced area near the wheel. Place the jack securely under this point.
- Lift the Car. Turn the jack handle to raise the car. Lift it until the flat tire is about six inches off the ground.
- Remove the Lug Nuts and Tire. Now you can fully unscrew the lug nuts. Keep them in a safe place. Pull the flat tire straight off the wheel hub. If it is stuck, gently kick the top or bottom of the tire to loosen it.
- Mount the Spare Tire. Lift the spare tire onto the hub. Line up the holes with the wheel studs. Push it on as far as it will go.
- Replace and Tighten Lug Nuts. Put the lug nuts back on. Tighten them by hand first. Then use the wrench to tighten them in a star pattern. This ensures even pressure.
- Lower the Car. Turn the jack handle to lower the car. Remove the jack.
- Final Tighten. Give each lug nut one final, firm tighten with the wrench. Make sure they are secure.
Important Tips
- Check Your Spare. A spare tire with no air is useless. Check its pressure every time you check your other tires.
- Know Your Spare Type. Some cars have a full-size spare. Others have a compact “donut” spare. Donut spares are smaller. They have speed and distance limits. Check your manual for details.
- Practice at Home. Try changing a tire in your driveway. It is much less stressful than learning on the side of a busy road.
How to Jump-Start a Dead Battery
A dead battery is another very common issue. You turn the key, and you hear a click or a slow crank. Sometimes you hear nothing at all. You can fix this with jumper cables and another car. Or you can use a portable jump starter.
Using Jumper Cables
- Position the Cars. Park the working car close to your car. They should not touch. Turn off both engines. Put both cars in park (or neutral for manual) and set the parking brakes.
- Identify the Terminals. Open both hoods. Find the battery. Look for the positive (+) and negative (-) terminals. They are usually red and black.
- Connect the Cables. This order is very important.
- Connect the red clamp to the positive (+) terminal of the dead battery.
- Connect the other red clamp to the positive (+) terminal of the good battery.
- Connect the black clamp to the negative (-) terminal of the good battery.
- Connect the other black clamp to an unpainted metal surface on your car. This is called grounding. Do not connect it to the dead battery’s negative terminal. A good spot is a bolt on the engine block.
- Start the Working Car. Start the car with the good battery. Let it run for a few minutes. This charges the dead battery a little.
- Start Your Car. Try to start your car. If it does not start, wait a few more minutes and try again.
- Remove the Cables. Once your car starts, remove the cables in the reverse order. Do not let the clamps touch each other.
Using a Portable Jump Starter
A portable jump starter is even easier. It is a battery pack with cables attached.
- Connect the red clamp to the positive (+) terminal.
- Connect the black clamp to the negative (-) terminal.
- Turn on the jump starter.
- Start your car.
- Turn off the jump starter and remove the clamps.
Safety Note: Batteries produce flammable gas. Do not smoke near a battery. Do not let the cable clamps touch. If you see a crack or leak in the battery, do not try to jump it.
What to Do When Your Engine Overheats
An overheating engine is a serious problem. You will see the temperature gauge rise. You might see steam coming from under the hood. You might smell something sweet. This is coolant.
Steps to Handle Overheating
- Turn Off the AC. Turn off the air conditioning. This reduces the strain on the engine.
- Turn On the Heat. Turn the heater on full blast. This draws heat away from the engine and into the car cabin. It will be uncomfortable, but it helps the engine.
- Pull Over Safely. Find a safe spot and pull over. Turn off the engine. This is the most important step. Continuing to drive can destroy your engine.
- Wait for the Engine to Cool. This is the hardest part. You must be patient. Do not open the hood immediately. The coolant is under high pressure and is extremely hot. Opening the radiator cap can cause severe burns.
- Check Coolant Level. After the engine has cooled (at least 30 minutes), you can open the hood. Check the coolant reservoir. It is a plastic tank with markings for “full” and “low.” If it is low, you can add a 50/50 mix of coolant and water.
- Call for Help. If the coolant is full, or if the engine overheats again, there is a bigger problem. You should call for a tow truck. Do not try to drive far.
Other Common Issues and How to Fix Them
Flat tires and dead batteries are the big two. But other things can go wrong. Here is how to handle them.
Running Out of Gas
It sounds simple. But it happens to many people. You are watching the fuel gauge. You think you can make it. Then the car sputters and stops.
- What to Do: Turn on your hazard lights. Pull over as far as you can. Call for roadside assistance or a friend to bring you gas. Many insurance policies include this service. Do not try to walk to a gas station on a busy highway. It is very dangerous.
- Prevention: Fill up when your tank is at a quarter full. This is a good habit.
Overheating or Engine Trouble
We covered overheating. But what if the engine just stops? Or it makes a terrible noise?
- What to Do: Pull over immediately. Turn off the engine. Do not try to restart it if it sounds bad. You could cause more damage. Call a tow truck.
- Your Tool Kit: You might not be able to fix a major engine problem. But you can use your flashlight to look for obvious issues. You might see a loose belt or a disconnected wire. If you do not see anything obvious, it is time to call a professional.
Minor Mechanical Issues
Sometimes, a screw comes loose. Or a hose starts to leak a little.
- What to Do: Your multi-tool or basic wrench set can be very helpful here. You can tighten a loose bolt. You can use duct tape or a specific tape to temporarily seal a small hose leak.
- Important: These are temporary fixes. They are designed to get you to a mechanic. They are not permanent repairs.
Building Your Ultimate Car Tool Kit
We talked about the basics. Now let us build a more advanced kit. This will help you handle common roadside emergencies using your car tool kit with even more confidence.
| Advanced Tool | Why You Need It |
|---|---|
| Tire Plug Kit | Allows you to repair a small puncture in the tire tread without removing the wheel. |
| Portable Air Compressor | Inflates a low tire. It is faster than a manual pump. Plugs into your car’s 12V outlet. |
| Duct Tape | Fixes many things temporarily. Hoses, bumper covers, you name it. |
| Zip Ties | Secure loose wires or parts. Very versatile. |
| Work Gloves | Protects your hands from dirt, heat, and sharp edges. |
| Rags or Paper Towels | Clean your hands and check fluid levels. |
| Pen and Paper | Leave a note. Write down information. |
Remember, the best tool kit is one you know how to use. Take time to learn about your car. Read the owner’s manual. Practice using your jack and jumper cables. This knowledge is just as important as the tools themselves.
“The most important part of your tool kit is knowing what to do with the tools you have,” says one expert guide. This is a crucial point. A tool is just a piece of metal until you know how to use it.
Using Your Tools: A Practical Guide
Let us put it all together. Here is a practical guide on how to handle common roadside emergencies using your car tool kit.
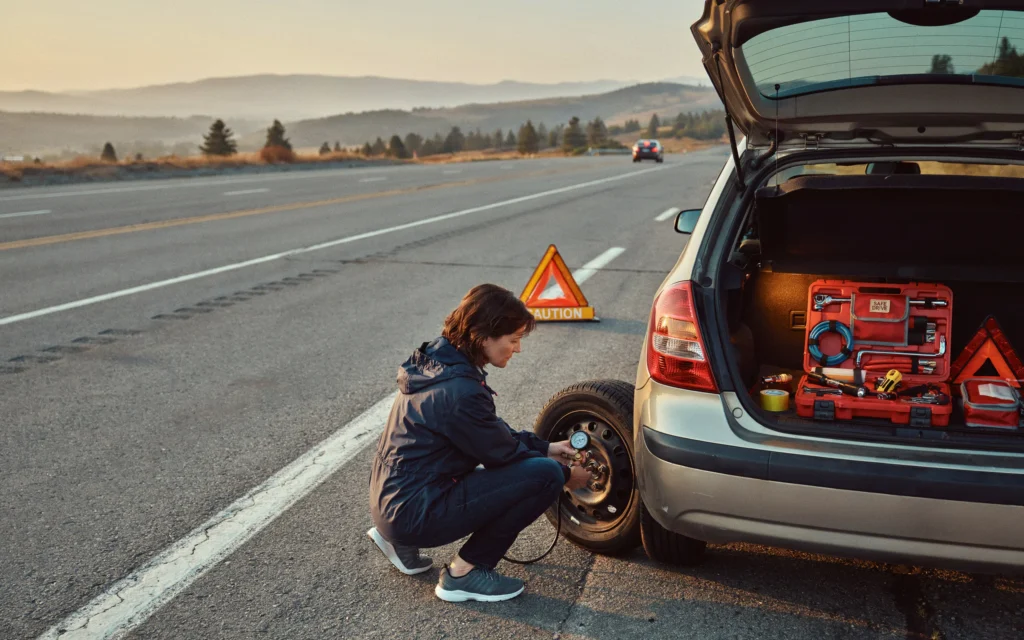
Scenario 1: The Slow Leak
You notice your tire looks a little low. You check the pressure with your gauge. It is below the recommended level.
- Solution: Use your portable air compressor to add air. Plug it into your car’s power outlet. Attach it to the tire valve. Turn it on and fill to the correct pressure. Then drive to a tire shop to find the leak.
Scenario 2: The Dead Battery at Home
You go to leave for work. The car will not start. You have jumper cables.
- Solution: Ask a neighbor for a jump. Follow the steps we discussed earlier. If no one is around, use your portable jump starter.
Scenario 3: The Overheating on a Road Trip
You are on a highway. The temperature gauge starts to climb.
- Solution: Turn off the AC. Turn on the heat. Pull over at the next safe exit. Turn off the engine. Wait for it to cool. Check the coolant. If it is low, add a 50/50 mix if you have it. If you do not, water is okay in an emergency. If it happens again, call for a tow.
Scenario 4: The Mysterious Warning Light
A light comes on your dashboard. You do not know what it means.
- Solution: Pull over safely. Turn off the engine. Check your owner’s manual. It explains what each light means. If it is a serious light (like the oil pressure or engine temperature light), do not drive. Call for a tow.
The Importance of Preparation
The key to handling any emergency is preparation. You have the tools. You have the knowledge. Now you need to put them together.
- Check Your Kit Regularly. Once a season, check your kit. Make sure the flashlight has batteries. Make sure the jumper cables are not frayed. Check the air pressure in your spare tire.
- Know Your Car. Read the owner’s manual. Learn where the jack points are. Learn how to open the hood. Know where the battery is.
- Stay Informed. Check the weather before a long trip. Plan your route. Let someone know where you are going.
An emergency car kit should include jumper cables or a portable jump starter, a flashlight with extra batteries, a first-aid kit, reflective triangles or road flares, and a tire inflator and sealant,” advises AAA. These items form the backbone of a good kit.
Frequently Asked Questions
1. What is the most common roadside emergency?
The most common roadside emergency is a flat tire. Dead batteries are a very close second. Knowing how to handle these two issues will solve most problems you face.
2. What tools do I need to change a flat tire?
You need a spare tire, a car jack, and a lug wrench. Some cars also have a special tool to remove wheel covers. Check your owner’s manual.
3. How do I use jumper cables safely?
Connect the red cable to the positive terminal on both cars. Connect the black cable to the negative terminal on the good battery, and then to an unpainted metal surface on your car. Never connect the black cable to the negative terminal of the dead battery. This can cause a spark.
4. What should I do if my car overheats?
Pull over and turn off the engine immediately. Let it cool down for at least 30 minutes. Do not open the radiator cap while it is hot. Check the coolant level once it is cool. Call for help if the coolant is low or if it overheats again.
5. Is a portable jump starter better than jumper cables?
A portable jump starter is much more convenient. You do not need another car. It is also safer in some ways. But jumper cables are cheaper and do not need to be charged. Both are good to have.
6. How often should I check my car emergency kit?
You should check your kit at least twice a year. Check it before summer road trips and before winter. Make sure everything is in good condition.
7. Can I use my car tool kit for any emergency?
Your car tool kit is for common mechanical issues. It will not help with a major accident or a medical emergency. Always carry a first-aid kit. Always call 911 for serious emergencies.
8. What if I do not feel safe changing a tire?
If you are on a busy road or feel unsafe, do not change the tire. Stay in your car with your seatbelt on. Call for professional roadside assistance. Your safety is more important than your time.
Conclusion
Driving comes with risks. But you do not have to be a victim of circumstance. You can be in control. You can handle common roadside emergencies using your car tool kit with confidence and skill.
We have covered a lot. We looked at the tools you need. We looked at the steps to fix a flat tire. We looked at how to jump-start a car. We looked at what to do when your car overheats. We also covered other common issues.
The message is clear. Preparation is your best friend. Build a good tool kit. Learn how to use it. Practice the skills. This knowledge is power. It turns a scary breakdown into a simple task.
Remember to always put safety first. Use your hazard lights. Set up your warning triangles. Wear a reflective vest. If you are unsure, call for help. There is no shame in asking for assistance.
The next time you hear that thump or turn that key to silence, you will know what to do. You will open your trunk, get your tools, and get to work. You will be back on the road in no time. Drive safe, and be prepared.
“Stay inside your vehicle, where it’s safer,” is a key piece of advice from AAA. Keep this in mind. Your car is a safe place. Use it to protect yourself while you wait for help or while you fix the problem.
You have the power to handle common roadside emergencies using your car tool kit. Now go out there and drive with peace of mind.
Related posts
 How Much Should I Spend On An Automotive Tool Kit
Are you asking, “How much should I spend on an automotive tool kit?” The answer is $50 to $500+ for home use. Your budget depends on…
 How Much Should I Spend On A Good Automotive Tool Kit
Wondering how much should I spend on a good automotive tool kit? For basic home use, budget $50-$150. For serious DIY, $200-$500. For pros, $600-$1500+. Read on…
 What Tools Should Every Homeowner Have
What Tools Should Every Homeowner Have. Discover essential tools every homeowner needs for basic repairs, maintenance, and DIY projects. Get a comprehensive checklist to equip your…