Learn how to use jumper cables safely with our step-by-step guide. Avoid common mistakes, protect your vehicle’s electronics, and get back on the road quickly. Essential tips for every driver.
We have all been there. You turn the key in the ignition, and instead of the familiar roar of the engine, you hear a sad clicking sound. Or maybe you hear nothing at all. Your battery is dead. It is one of the most common and frustrating problems for drivers. But do not worry. It is also one of the easiest problems to fix if you have a friend with a car and a set of jumper cables.
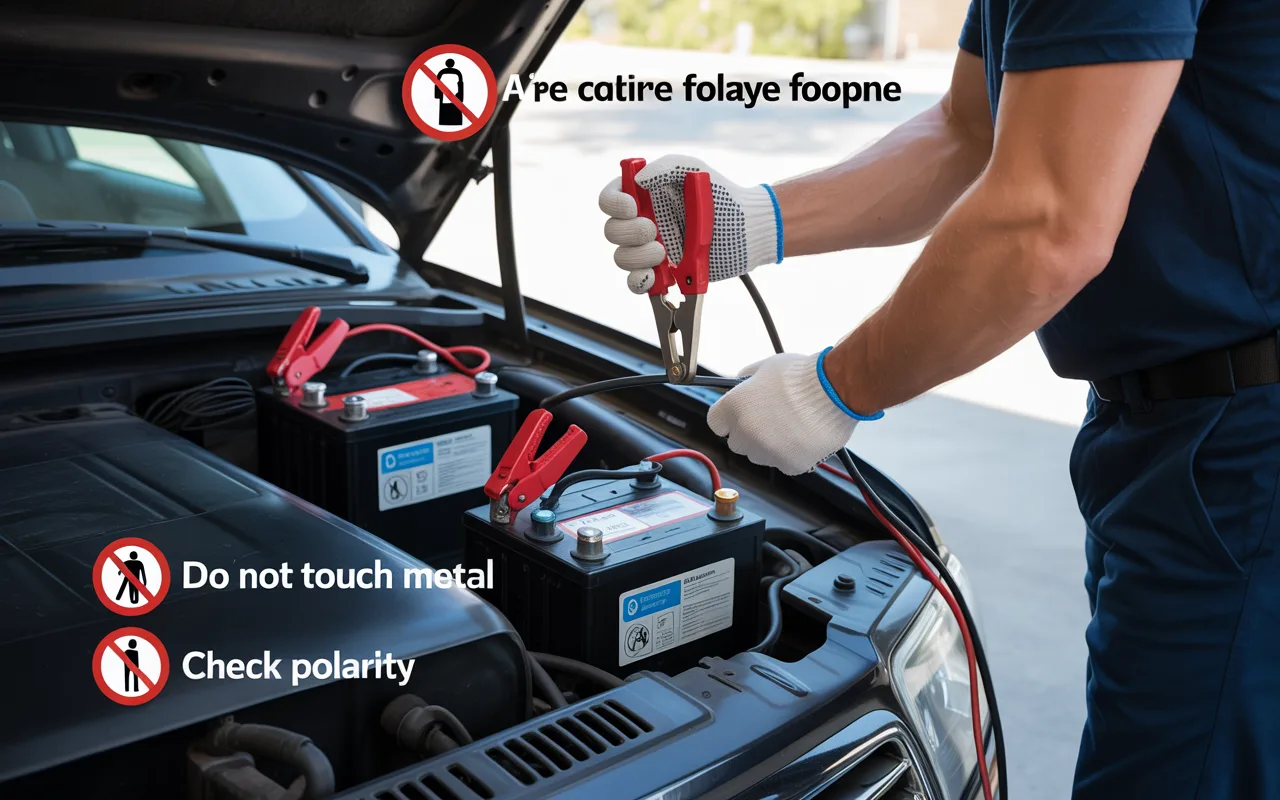
However, a dead battery is not the only risk here. Car batteries contain acid and produce explosive hydrogen gas. Your car’s electrical system is also full of sensitive computers. If you connect the cables in the wrong order or make a mistake, you could damage both cars or hurt yourself. That is why knowing how to use jumper cables safely is so important. It is not just about getting power from one battery to another. It is about doing it in a way that keeps everyone safe.
I have jumped hundreds of cars over the years, from old trucks to brand new sedans. I have made mistakes too, and I learned from them. I want to share that experience with you so your first time, or your next time, goes smoothly. This guide will walk you through everything you need to know. We will cover the gear you need, the step-by-step process, and the common pitfalls to avoid.
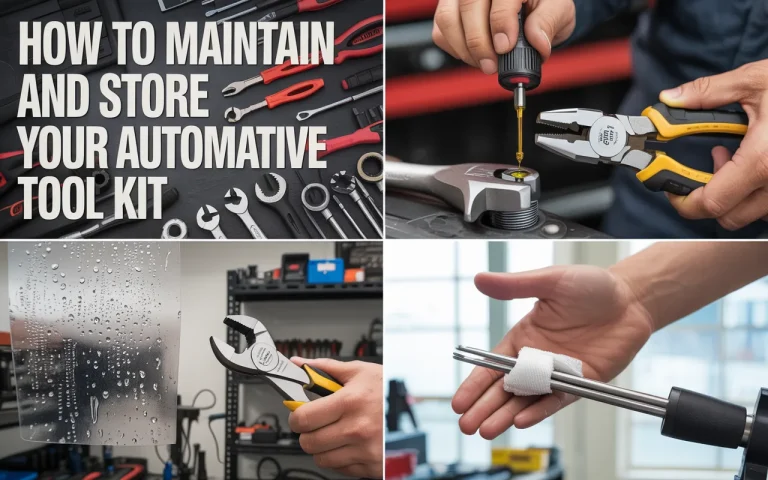
Understanding Your Equipment
Before you even pop the hood, you need to understand the tools you are using. Jumper cables are simple, but not all are created equal. Using the wrong kind can make the job harder or even dangerous.
Choosing the Right Jumper Cables
If you do not own a set of jumper cables yet, or if yours are old and worn, now is the time to think about an upgrade. The quality of your cables matters a lot.
Wire Gauge: This is the most important factor. The gauge is the thickness of the wire inside the insulation. The number works backward: a lower number means a thicker wire. For example, a 2-gauge cable is much thicker than a 10-gauge cable. You want a low number. Thicker wires carry more power from the good battery to the dead one. For most cars, a 4-gauge or 6-gauge cable is a good choice. If you have a large truck or an SUV with a big engine, go for 2-gauge. Thin cables (like 8-gauge or 10-gauge) might not carry enough current to start a larger engine. They can also overheat.
Length: Longer cables are usually better. A 12-foot or 16-foot set gives you flexibility. You can park the cars nose-to-nose or side-by-side. Sometimes, because of where the batteries are located, you need that extra length to reach.
Clamp Quality: The clamps, also called jaws or clips, should feel sturdy. They should have strong springs and bare metal teeth. They need to bite through any dirt or corrosion on the battery terminals to make a good connection.
Safety Gear You Should Have
It is smart to keep a few extra things in your car. They can make the process safer and easier.
- Safety Glasses: A small pair of cheap safety glasses can protect your eyes if a battery sparks or if there is acid splatter.
- Work Gloves: Battery acid is corrosive. Gloves protect your hands. They also give you a better grip on the slippery clamps.
- Wire Brush: Battery terminals often get crusty with corrosion. A wire brush lets you clean them off for a better connection. Sometimes, a bad connection is the real problem, not a dead battery.
- Owner’s Manual: Your car’s manual has specific information about the battery and jump-starting procedure for your exact model. Keep it in your glove box.
Preparing for a Safe Jump Start
Okay, you have your cables and your safety gear. You have a friend willing to help. Now, before you connect anything, you need to prepare. Rushing into this step is a big mistake.
Position the Cars Correctly
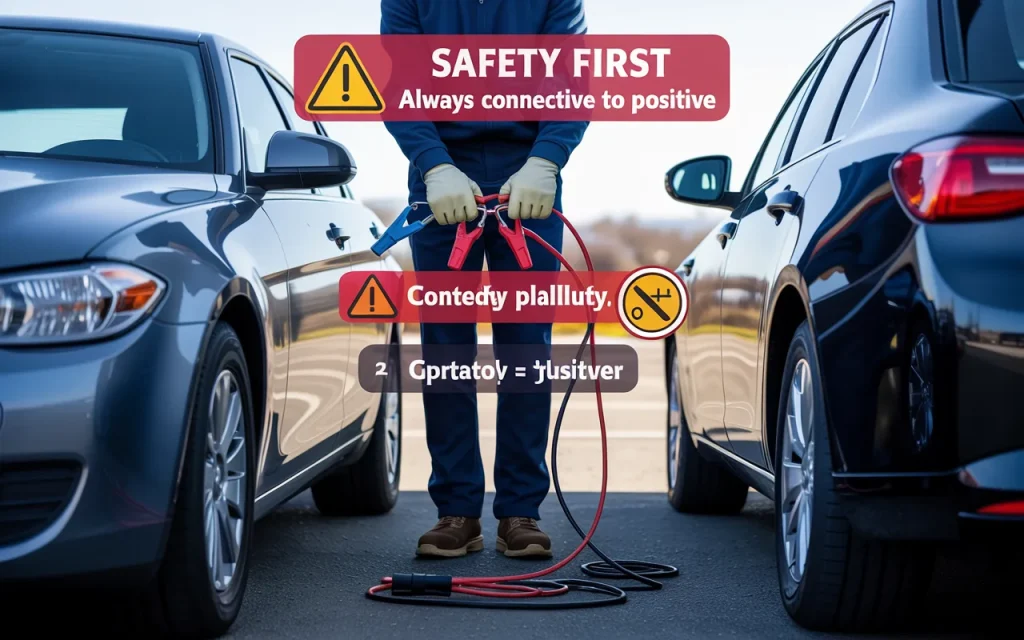
First, get the two cars close enough so the cables can reach. But do not let them touch. Park them facing each other, or side-by-side. The most important rule here: the cars should not be touching. If the metal bodies of the cars are touching, it can create a dangerous electrical path.
Put both cars in Park (for automatic transmissions) or Neutral (for manuals). Set the parking brakes on both vehicles. This is a safety must. You do not want either car moving while you are working near the engine.
Turn Everything Off
This is a step people often forget. Before you connect any cables, turn off both cars completely. Take the keys out of the ignition. Then, turn off everything else:
- Headlights and fog lights
- Radio and infotainment system
- Turn signals and hazard lights
- Air conditioner or heater
- Windshield wipers
- Any phone chargers plugged in
Why do you need to do this? When you connect the jumper cables, there can be a power surge. If your radio or other electronics are on, that surge can damage them instantly. Modern cars have very sensitive computer modules. Turning everything off protects them. It also reduces the initial demand on the batteries when you try to start the dead car.
“I once watched a friend try to jump a car while the radio was blasting. When the cables connected, there was a pop and the radio never worked again. Electronics are fragile. Always turn everything off first.” – Mike Thompson, Auto Mechanic for 20 years.
The Correct Order: How to Use Jumper Cables Safely
This is the heart of the process. The order in which you connect the clamps is critical. There is a reason for every step. Follow this exactly, and you will be fine.
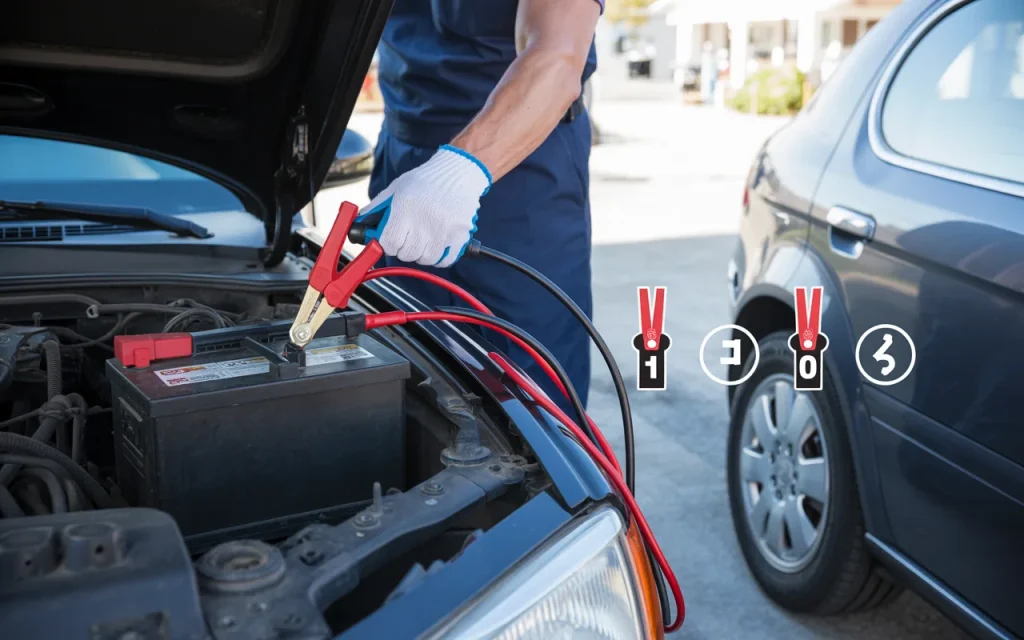
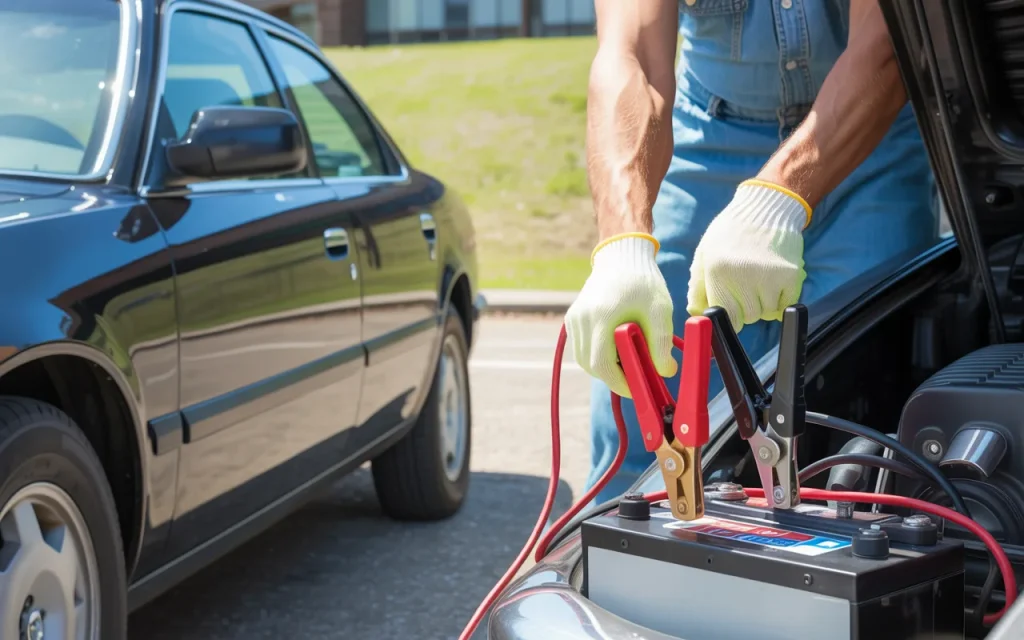
Before you start, identify the positive and negative terminals on both batteries. The positive terminal usually has a red cover or a plus (+) sign next to it. It might also have a larger cable connected to it. The negative terminal usually has a black cover or a minus (-) sign. It connects directly to the car’s body.
Table 1: Jumper Cable Connection Order
| Step | Clamp Color | Connection Point |
|---|---|---|
| 1 | Red | Connect to the positive (+) terminal of the dead battery. |
| 2 | Red | Connect to the positive (+) terminal of the good battery. |
| 3 | Black | Connect to the negative (-) terminal of the good battery. |
| 4 | Black | Connect to an unpainted metal surface on the dead car’s engine block or frame. Do not connect to the dead battery’s negative terminal. |
Let’s break that down. The final connection, the last black clamp, is the most important safety step. You should not clamp it to the dead battery. Why? Because when you make the final connection, there is often a small spark. Car batteries can give off hydrogen gas. If you spark near the battery, you could ignite that gas. It is rare, but it can happen.
By connecting the final clamp to a metal bracket, a bolt on the engine, or another solid metal part away from the battery, you move that potential spark away from the danger zone. Make sure the spot you choose is clean and unpainted. Paint acts as an insulator. You need bare metal for the electricity to flow.
The Jump Starting Process Step by Step
Now that everything is connected, you are ready to start the cars. Follow these steps in order.
- Start the Donor Car: Start the car with the good battery. Let it run for a minute or two. This allows its alternator to start charging and sends some power down the cables to the dead battery. You can gently press the gas pedal to raise the engine speed a little, which helps the alternator produce more power.
- Wait a Few Minutes: Do not try to start the dead car right away. Give it time. Let the donor car run for about two to five minutes. This allows a small charge to build up in the dead battery. Think of it like giving it a small sip of water before a big drink. It helps.
- Try to Start the Dead Car: Get in the car with the dead battery and try to start it. It might crank slowly at first, or it might start right up. If it does not start, do not keep cranking the starter for more than a few seconds. This can overheat the starter motor and drain the good battery. Let the donor car run for another five minutes and try again.
- If It Starts, Let It Run: Once the dead car starts, do not turn it off. Leave it running. Disconnecting the cables immediately can sometimes cause the car to stall if its own charging system is not yet stable.
- Disconnect the Cables in Reverse Order: Now you need to remove the cables. This is just as important as connecting them. Do it in the exact reverse order.
Table 2: Jumper Cable Disconnection Order
| Step | Clamp Color | Disconnection Point |
|---|---|---|
| 1 | Black | Disconnect from the ground point (metal surface) on the previously dead car. |
| 2 | Black | Disconnect from the negative (-) terminal of the donor car’s battery. |
| 3 | Red | Disconnect from the positive (+) terminal of the donor car’s battery. |
| 4 | Red | Disconnect from the positive (+) terminal of the previously dead battery. |
Be careful when removing the clamps. Do not let the clamps touch each other while any part is still connected to a battery. Also, be careful not to let the red (positive) clamp touch any metal part of the car body after you remove it.
What to Do After the Jump Start
Your car is running. The cables are safely stored in the trunk. You are ready to go, right? Not quite. There are a few more things you need to know.
Drive, Don’t Idle
Your alternator charges the battery while the engine is running. But it charges more effectively when the engine is at a higher speed than idle. So, do not just sit in the parking lot with the car running. Drive it. Drive for at least 20 to 30 minutes. This gives the alternator enough time to put a significant charge back into the battery. Use normal roads, not just highway driving if possible. A mix of speeds is good. This is the best way to ensure you won’t stall and need another jump later.
Know When Your Battery is Failing
A dead battery is often a symptom, not the problem itself. If your battery is old, it might just be time for a replacement. Most car batteries last between three and five years. If your battery is older than that, a jump start is only a temporary fix.
Here are signs that your battery might be failing and needs to be tested or replaced:
- The engine cranks slowly when you try to start it on a cold morning.
- The headlights seem dim when the car is idling.
- You see corrosion (a white, ashy powder) building up on the battery terminals.
- The battery case looks swollen or bloated.
- You have needed multiple jump starts in a short period.
If you notice any of these signs, drive to a local auto parts store or your mechanic. Most places will test your battery for free. They can tell you for sure if it needs to be replaced. It is much better to find out in their parking lot than to be stuck somewhere again later.
“A jump start is a favor, not a fix. If your battery dies once, it could be a fluke. If it dies twice in a week, you have an underlying issue that needs attention.” – Sarah Jenkins, AAA Roadside Assistance Technician.
Common Mistakes and How to Avoid Them
Even with the best instructions, mistakes happen. Here are some of the most common errors people make when they try to use jumper cables safely, and how you can avoid them.
Mistake 1: Connecting Red to Black. This is the classic mix-up. Connecting the positive cable to the negative terminal will cause a massive short circuit. It can weld the clamps to the battery posts, blow fuses, or even cause a battery explosion. Always double-check the plus (+) and minus (-) signs before you connect anything.
Mistake 2: Connecting the Final Negative Clamp to the Dead Battery. As we discussed, this puts the spark right next to the battery. It is a small but real explosion risk. Always use that bare metal ground point. It is one of the most important steps to use jumper cables safely.
Mistake 3: Letting the Cars Touch. If the metal bodies of the two cars are touching, they complete an electrical circuit. When you try to start the dead car, a huge amount of current could flow through the car bodies instead of the cables. This can damage the electrical systems in both cars. Keep a little space between them.
Mistake 4: Cranking the Starter Too Long. The starter motor draws a massive amount of power. If you crank it for 20 or 30 seconds without the engine starting, you are generating a lot of heat. This can burn out the starter motor. It also drains the good battery very quickly. Crank for no more than 5 to 10 seconds at a time. Wait a minute, let things cool down, and try again.
Mistake 5: Ignoring the Owner’s Manual. Some hybrid cars, electric vehicles, or high-end luxury cars have very specific jump-starting procedures. Some do not have traditional batteries in the hood. Some have jump start posts located in the trunk or under the back seat. Your owner’s manual knows best. Check it first.
When Not to Use Jumper Cables
There are times when you should not attempt a jump start. Knowing when to say no is also part of how to use jumper cables safely.
Visible Battery Damage: If the battery case is cracked, leaking fluid, or swollen, do not go near it. Leaking acid is dangerous, and a swollen case indicates an internal problem. Call a professional.
Strong Smell: If you smell rotten eggs or sulfur around the battery, it is venting gas. This is a sign of a serious problem. Do not create any sparks. Call for roadside assistance.
Extreme Cold: In very cold weather, a frozen battery can explode if you try to jump it. If your battery is frozen (the electrolyte inside turns to ice), you need to thaw it out safely or replace it before attempting a jump. If the fluid is slushy, do not jump it.
Different Voltages: This is rare for cars, but worth mentioning. Almost all cars use a 12-volt system. If you are dealing with a classic 6-volt car, or a heavy-duty truck with a 24-volt system, do not connect them with standard jumper cables. You will cause major damage.
“I always tell people, look at the battery first. If it looks like it’s in distress, with cracks or bulges, just step back. Your safety is worth more than the cost of a tow truck.” – David Chen, Owner of Chen’s Auto Repair.
Frequently Asked Questions
Q: Can I jump-start a car in the rain?
A: Yes, you can. Rain itself is not a danger. Modern cars and jumper cables are insulated. The bigger risk is slippery surfaces and reduced visibility. The process is the same. Just be careful not to drop cables into standing water while they are connected. Make sure your hands and the clamps are as dry as possible.
Q: Which car do I turn off first after the jump?
A: It does not matter much, but a good habit is to let the jumped car continue running. You can then turn off the donor car and disconnect the cables. Or, you can disconnect the cables while both cars are still running. Just be very careful with the clamps. The key is to ensure the jumped car keeps running after everything is disconnected.
Q: My cables are getting hot. Is that normal?
A: Cables can get slightly warm during use, especially if the dead battery is very dead and draws a lot of current. But if they are hot to the touch, that is a warning sign. It means the connection is poor or the cables are too thin for the job. Stop immediately. Check that the clamps are on tight and on clean metal. Let them cool down before trying again.
Q: Can I use a smaller car to jump-start a large truck?
A: You can try, but it might not work. A small car battery may not have enough power (cold cranking amps) to turn over a large truck engine. It can also put a lot of strain on the small car’s electrical system. If you try, follow the same steps. If the truck doesn’t start after a few tries, you may need a larger donor vehicle or a heavy-duty portable jump pack.
Q: How long should I let my car run after a jump start?
A: You should let it run for at least 20 to 30 minutes, and ideally, you should drive it during that time. This gives the alternator a good chance to recharge the battery. Just letting it idle in the driveway is not as effective because the alternator spins slower at idle.
Conclusion
Getting stuck with a dead battery is never fun. It always seems to happen at the worst possible time. But it is a simple problem with a simple solution. By keeping a good set of jumper cables in your trunk and understanding the process, you can handle the situation with confidence.
The most important thing to remember is that the order matters. Connecting the cables in the right sequence protects you and your cars. Always connect the positive clamps first, then the negative clamp to the good battery, and finally, the last negative clamp to a metal ground on the dead car. This final step is the key to how to use jumper cables safely. It moves the spark away from the battery.
After you get the car started, remember to drive it for a while to recharge the battery. And pay attention to your battery’s health. If it is old or showing signs of trouble, get it tested. A few minutes of preventive maintenance can save you from being stranded again next week.
You have the knowledge now. It is straightforward and easy to remember. Next time you see a friend in a parking lot with their hood up, you can help them out the right way. Stay safe and happy driving.