Learn the best way how to clean a tool bag with these easy steps. Keep your tools organized and your bag free from dirt, dust, and grime. Simple methods for a longer-lasting tool bag.
Is your tool bag looking a bit rough? You reach in for a wrench, and your hand comes out covered in dust and grease. It happens to everyone. A tool bag works hard. It sits on dusty floors, gets tossed in truck beds, and holds tools covered in oil and dirt. Over time, that grime builds up. A dirty bag is not just about looks. It can make your tools dirty and harder to find. It can even wear out the bag faster.
Learning how to clean a tool bag is a simple skill. It keeps your gear looking good and working well. A clean bag also helps you stay organized. You can see what you have. You are not digging through a pile of dusty stuff. Plus, it just feels better to use clean equipment. Whether you have a small pouch or a large rolling bag, the cleaning process is pretty much the same. Let us walk through the steps together. You will be surprised how easy it is to get that bag fresh again.
Why You Need to Know How to Clean a Tool Bag
A tool bag takes a beating. It is the workhorse of your trade. But many people forget to clean it. They clean their tools but leave the bag dirty. This can cause problems. Dirt and grit can scratch your tools. Moisture trapped in a dirty bag can lead to rust. And a heavy, dirty bag is just no fun to carry around.
Knowing how to clean a tool bag helps you protect your investment. Tool bags are not cheap. A good one can last for years if you take care of it. Cleaning removes the stuff that breaks down the fabric and zippers. It keeps the bag strong.
Another big reason is organization. When your bag is clean, you can actually see the compartments. You know where your screwdrivers are. You can find that small socket you need. A messy, dirty bag makes you waste time looking for things. Time is money in any job. So, taking an hour to clean your bag can actually save you time later.
What You Need Before You Start
Before we get into the steps, you need to gather a few things. Having everything ready makes the job quick and easy. You probably have most of these items at home already.
Here is a simple list of supplies:
- A bucket of warm water
- Mild dish soap
- An old towel or rag
- A soft-bristled brush (like an old toothbrush)
- A hose or access to running water (if cleaning outside)
- A vacuum cleaner with a hose attachment (optional but helpful)
Stay away from harsh chemicals. Things like bleach or strong degreasers can damage the fabric of your bag. They might also leave a smell that stays for a long time. Stick to gentle soap and water. It is safe and works great for most cleaning jobs.
Quick Prep: Empty Your Bag Completely
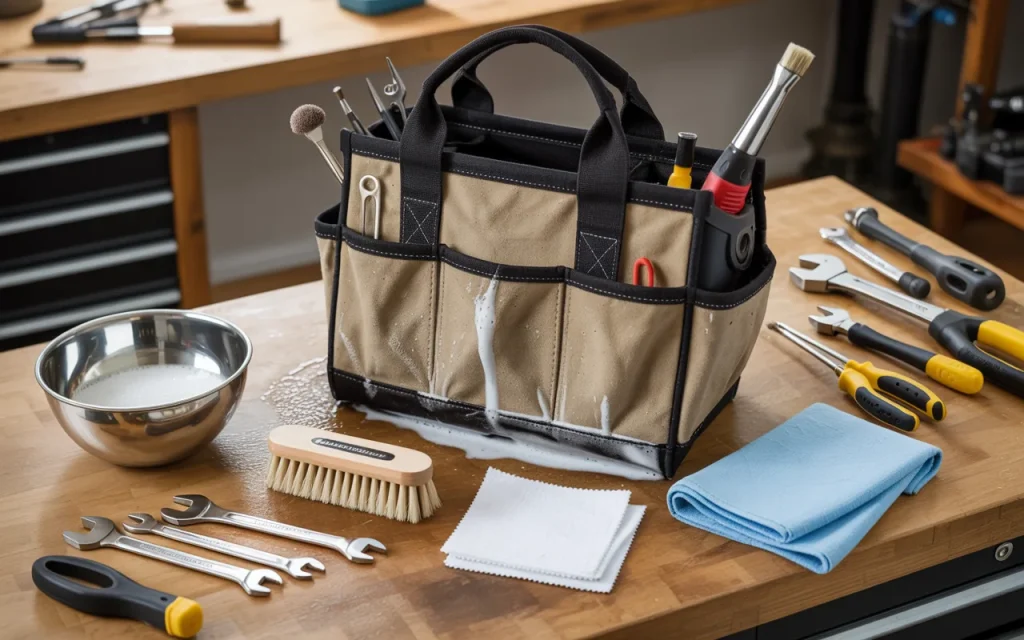
The first real step is to empty the bag. Take everything out. Every single tool and screw. This is the perfect time to clean your tools too. Wipe them down with a rag. Check for any tools that are broken or rusty. You might find things you forgot you had. Lay everything out so you can see what you own. This helps you organize better when you put things back.
Turn the bag upside down and give it a good shake. You will be amazed at the stuff that falls out. Dust, dirt, small rocks, and old receipts. Getting all the loose stuff out first makes the washing part much easier. If you have a vacuum, use the hose attachment to suck up dirt from the corners and pockets. This step alone can make a big difference.
Step-by-Step: How to Clean a Tool Bag the Right Way
Now for the main event. Here is a clear, simple guide on how to clean a tool bag. We will cover different types of bags and materials. Most tool bags are made from heavy canvas, nylon, or polyester. These steps work for all of them.
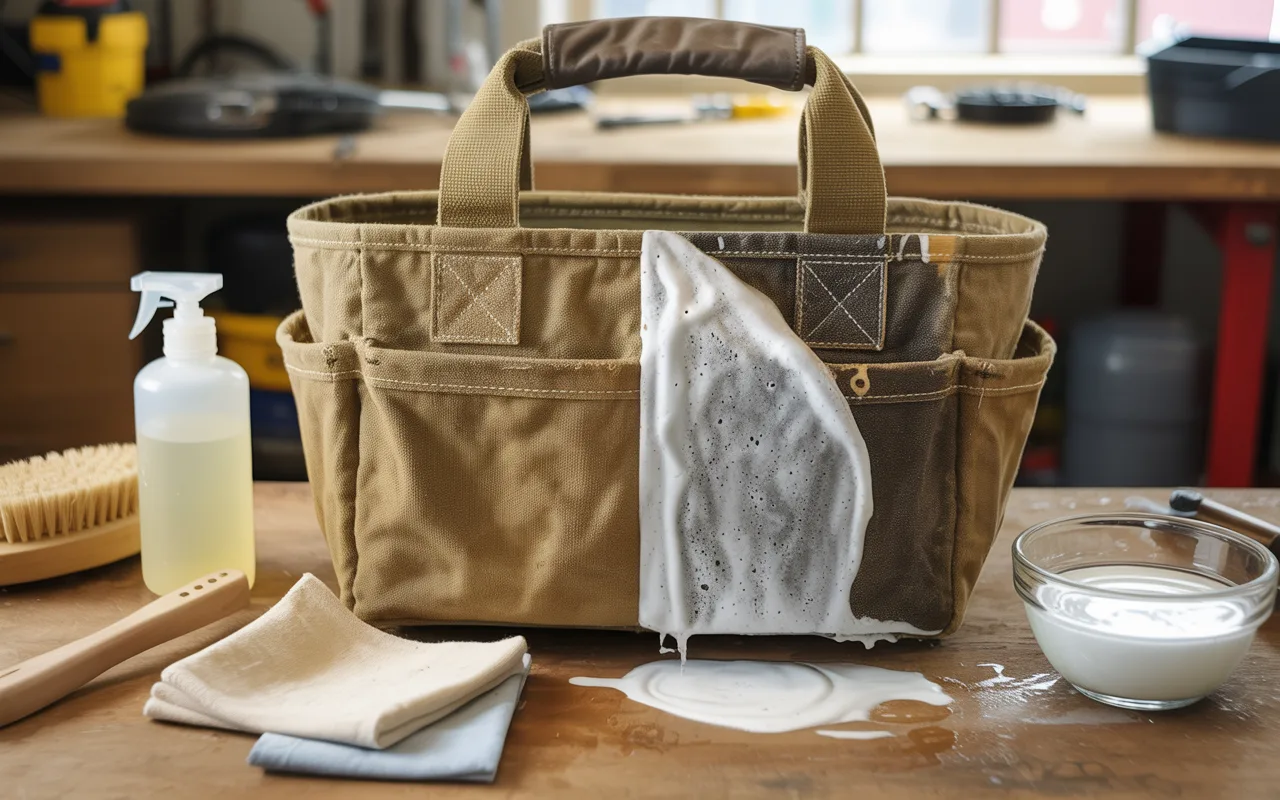
Step 1: Spot Clean Stubborn Stains
Before you wash the whole bag, look for tough stains. You might have grease spots or areas with caked-on mud. Take your soft brush. Dip it in the warm, soapy water. Gently scrub the dirty spots. Use a circular motion. This helps break up the grime without hurting the fabric. For really sticky grease, let the soap sit on the spot for a few minutes. Then scrub again. This spot cleaning step targets the worst areas first.
Step 2: Wash the Exterior
After you treat the stains, it is time to wash the outside. You can do this in a few ways. If your bag is small, you can fill your bucket with soapy water. Use a clean rag to wipe down the entire outside of the bag. Dip the rag in the water, wring it out so it is damp, and wipe the fabric. Work from the top down. This stops dirty water from running over clean areas.
For larger bags, it might be easier to do this outside. Use a hose to wet the bag. Then, using a rag or long-handled brush with soapy water, scrub the whole thing. Pay attention to the bottom. The bottom gets the most dirt. Rinse the soap off with clean water from the hose. Make sure all the soap is gone. Soap left in the fabric can attract more dirt later.
Step 3: Clean the Inside and Pockets
The inside of the bag can get pretty nasty. There is often dust and small metal shavings. Use your vacuum first to get the loose stuff. Then, take a damp, soapy rag and wipe down the inside lining. Be careful with pockets. You do not want to tear them. Use your fingers or the soft brush to clean in there. Rinse by wiping with a clean, damp rag. You want to remove all soap.
For the inside, you do not want it to get too wet. It takes a long time to dry. Using a damp rag, rather than soaking it, is the best way to clean the interior. This removes the dirt without making the bag soggy.
A Helpful Table for Cleaning Different Materials
Different tool bags use different materials. Here is a quick guide on what to do for each type.
| Bag Material | Best Cleaning Method | Things to Avoid |
|---|---|---|
| Canvas | Use mild soap, warm water, and a soft brush. Spot clean first. | Harsh brushes that can rough up the fibers. Too much water. |
| Nylon/Polyester | Soapy water and a rag work great. Can handle more scrubbing. | Hot water, which can warp some synthetic materials. Bleach. |
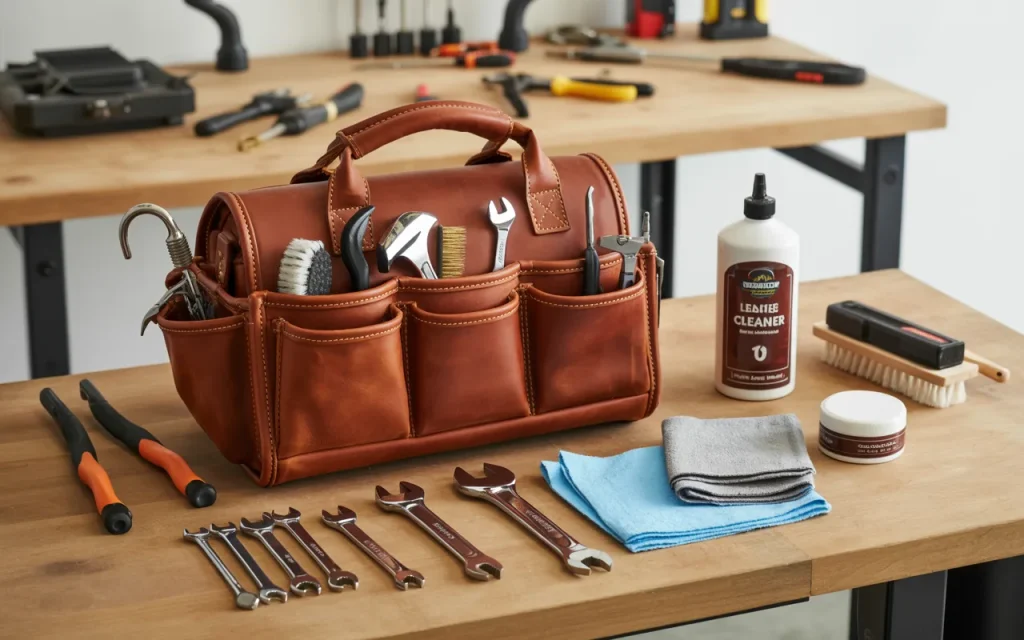
| Leather | Use a special leather cleaner. Wipe with a damp cloth only. | Water soaking. Never submerge leather. Avoid dish soap. |
| Vinyl | Wipe with a cloth and mild cleaner. Very easy to clean. | Abrasive pads that will scratch the surface. |
How to Dry Your Tool Bag Properly
Drying is a super important part of learning how to clean a tool bag. If you put your tools into a wet bag, they will rust. Rusty tools are useless. Also, a damp bag can grow mold or mildew. That smells bad and can ruin the bag.
After you finish washing, use a dry towel to soak up as much water as you can. Press the towel against the fabric. Get the big drips off.
Then, find a place to let the bag air dry. A sunny spot is best. The sun helps dry it faster. Open the bag up wide. Let air get inside. If the bag has a hard bottom, turn it upside down so water does not pool there. Let it dry for at least 24 hours. Do not use a dryer or a hair dryer. High heat can melt the fabric or damage the straps. Be patient. Wait until the bag is 100% dry before you put your tools back in.
Keeping Your Tool Bag Cleaner for Longer
Now that your bag is fresh and clean, you want it to stay that way. A little regular care makes a big difference. You will not have to do such a deep clean as often.
Here are some easy tips:
- Wipe it down weekly: At the end of the week, take a dry rag and wipe the outside of the bag. This removes surface dust before it builds up.
- Shake it out: Every time you finish a job, give the bag a quick shake upside down. This gets rid of small debris.
- Watch what you put inside: Try to wipe greasy tools before you put them back. If a tool is dripping oil, wrap it in a rag first.
- Store it right: Do not leave your bag on the wet ground. Keep it off the floor in your truck or garage.
Following these simple habits keeps the grime away. It makes your next deep cleaning session much faster. It also helps you keep track of your tools. When the bag is not full of junk, you notice right away if a tool is missing.
Common Mistakes People Make
A lot of people try to clean their bag but make things worse. Let us look at what not to do. Knowing these mistakes helps you do a better job cleaning.
First, do not put your tool bag in the washing machine. Even if it is small, the machine can break straps and bend the frame. It is too rough. Another big mistake is using too much water. Soaking the bag can ruin the padding and take forever to dry. Always use a damp cloth, not a soaking wet one.
Also, do not forget about the metal parts. Zippers and buckles can rust. When you wash the bag, try to keep these parts dry. If they get wet, dry them off right away with a towel. A little bit of dry lubricant on the zipper after it is clean helps it slide better.
Another Quick Reference Table
Sometimes you need a fast checklist. This table gives you a simple plan to follow.
| Step | Action | Why It Matters |
|---|---|---|
| 1 | Empty everything out. | Find lost items and let the bag breathe. |
| 2 | Vacuum or shake out loose dirt. | Removes the dry stuff that turns to mud when wet. |
| 3 | Spot clean stains with a brush. | Targets tough grease and grime. |
| 4 | Wipe down with a damp soapy rag. | Cleans the main surfaces without soaking the bag. |
| 5 | Rinse with a clean damp rag. | Takes the soap away so it does not attract dirt. |
| 6 | Towel dry and air dry fully. | Prevents rust on tools and stops mold growth. |
Expert Advice on Tool Bag Care
Hearing from people who use tools every day can be helpful. They have learned a few things over the years. Here is some advice from folks in the trades.
“I clean my bag at the end of every big job. It takes ten minutes to wipe it down. That ten minutes saves me hours of looking for lost sockets later on. A clean bag is an organized bag.”
*- Mark Henderson, General Contractor for 20 years*
This quote shows that cleaning is not just about looks. It is about working smart. When your bag is clean, you are more efficient. You spend less time searching and more time working.
Another tip comes from someone who works with metal every day.
“The biggest enemy of a tool bag is metal shavings. They get in the fabric and cut it from the inside. I use a strong magnet to pull them out of the pockets before I even think about washing it. That one trick has doubled the life of my bags.”
– Lisa Chen, Welder and Fabricator
Lisa brings up a great point. Sometimes you need to handle specific types of dirt. Metal shavings are sharp. They can cut your hands and damage the bag. Removing them first is a smart move.
Finally, remember that your bag is an investment.
“I tell all my apprentices, take care of your tools, and take care of your bag. The bag protects the tools. If the bag fails, your tools get damaged. It is all connected. Spend the money on a good bag, and then spend the time to keep it clean.”
– David Miller, Master Electrician
David’s point is simple. Your tool bag is part of your tool kit. It deserves the same care as your hammer or drill. When you know how to clean a tool bag, you are protecting everything inside it.
Frequently Asked Questions
How often should I clean my tool bag?
It depends on how much you use it. For daily use, a quick wipe down every week is good. A deep clean, like the one we described, is good every few months. If the bag gets really dirty or something spills in it, clean it right away.
Can I put my tool bag in the washing machine?
No, you should not. The machine can be too rough. It can break zippers, bend plastic parts, and ruin the shape of the bag. Hand washing is always the safer and better choice.
What is the best soap to use?
A mild dish soap is perfect. It cuts through grease but is gentle on fabric. Stay away from heavy chemicals, bleach, or fabric softener. These can damage the material.
How do I get a bad smell out of my tool bag?
First, make sure the bag is completely dry. Mildew causes smells. After cleaning, if the smell remains, try sprinkling baking soda inside. Let it sit for a day, then vacuum it out. Baking soda absorbs odors naturally.
My bag has a hard plastic bottom. How do I clean it?
Plastic bottoms are easy. Just wipe them with a soapy rag. You can scrub them a bit harder if they are caked with mud. Rinse with a damp rag. Make sure to dry the plastic so water does not sit and get into the fabric edges.
Conclusion
Keeping your gear in top shape is a big part of any job. Your tool bag works hard every day. It carries the weight and takes the abuse. Taking the time to learn how to clean a tool bag is a simple way to say thank you to your gear. It also makes your workday easier.
A clean bag helps you find tools fast. It protects your tools from dirt and rust. It even makes the bag itself last longer. The process is not hard. You just need some soap, water, and a little bit of time. Empty the bag, scrub the dirt, and let it dry. That is really all there is to it.
Try to make cleaning a habit. Give your bag a quick look at the end of the week. Wipe off the dust. Shake out the debris. When you take care of the small things, the big cleaning jobs are less work. Your tools will thank you, and you will feel better walking onto the job site with a clean, organized bag. It is a small effort that pays off in a big way.