Learn how to assemble a roadside emergency tool kit that actually works when you need it. This guide covers essential items, storage tips, and maintenance advice for every driver.
Getting stuck on the side of the road is never part of the plan. A flat tire, a dead battery, or an overheated engine can happen to anyone, anywhere. The difference between a small inconvenience and a really bad day often comes down to being prepared.
I have been driving for over twenty years, and I have learned the hard way what works and what does not. That is why I want to share practical steps on how to assemble a roadside emergency tool kit. You do not need to be a mechanic or spend a lot of money. You just need the right items and a little bit of planning.
Let me walk you through exactly what you need, why you need it, and how to put it all together so you can handle common roadside problems with confidence.
Why You Need to Assemble a Roadside Emergency Tool Kit Right Now
Many drivers wait until something happens before they think about emergency supplies. By then, it is too late. A well-stocked kit gives you options. It helps you fix small problems before they become big ones. It also keeps you safe while you wait for help.
“Preparation is not about being scared. It is about being smart. A few simple tools can turn a stressful situation into a manageable one.” – Mark Stevens, Auto Safety Instructor
When you assemble a roadside emergency tool kit yourself, you know exactly what is inside. You can customize it for your vehicle, your driving habits, and the weather where you live. Store-bought kits are fine, but making your own ensures you have quality items that actually work.
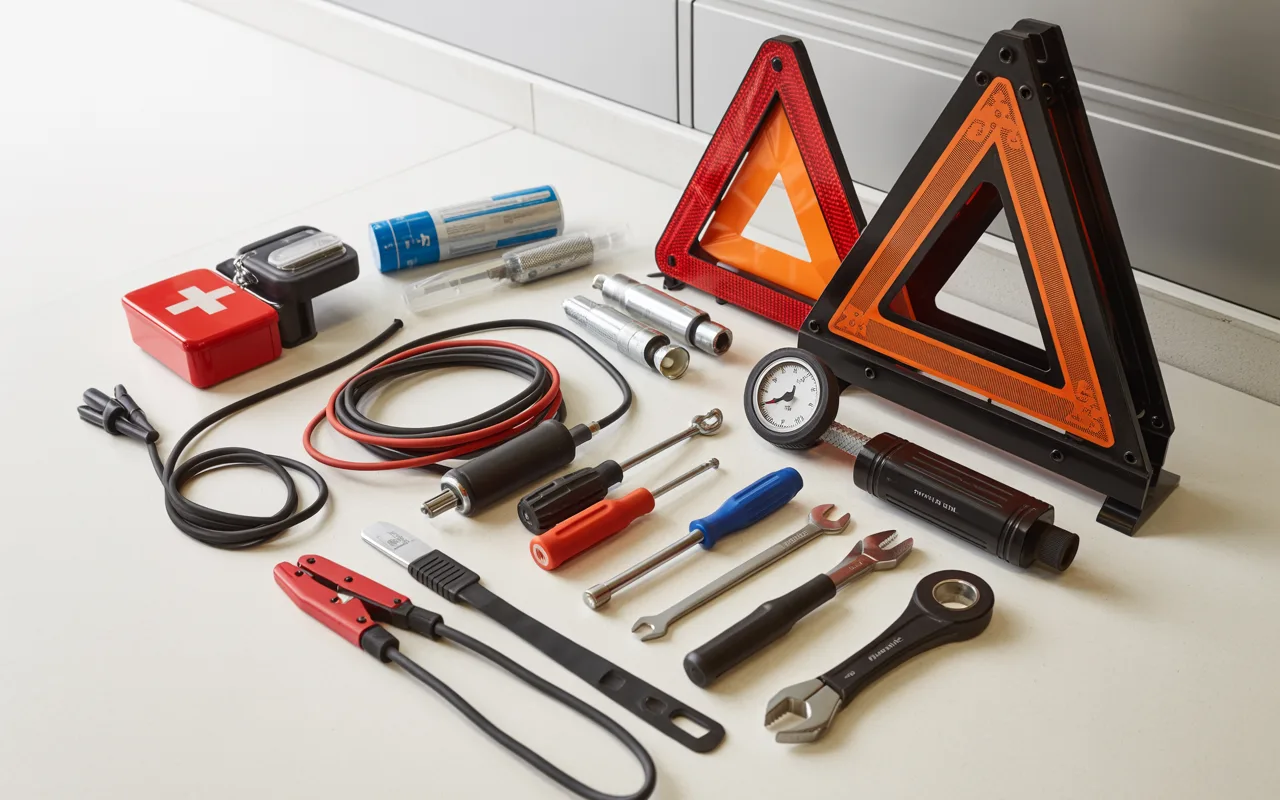
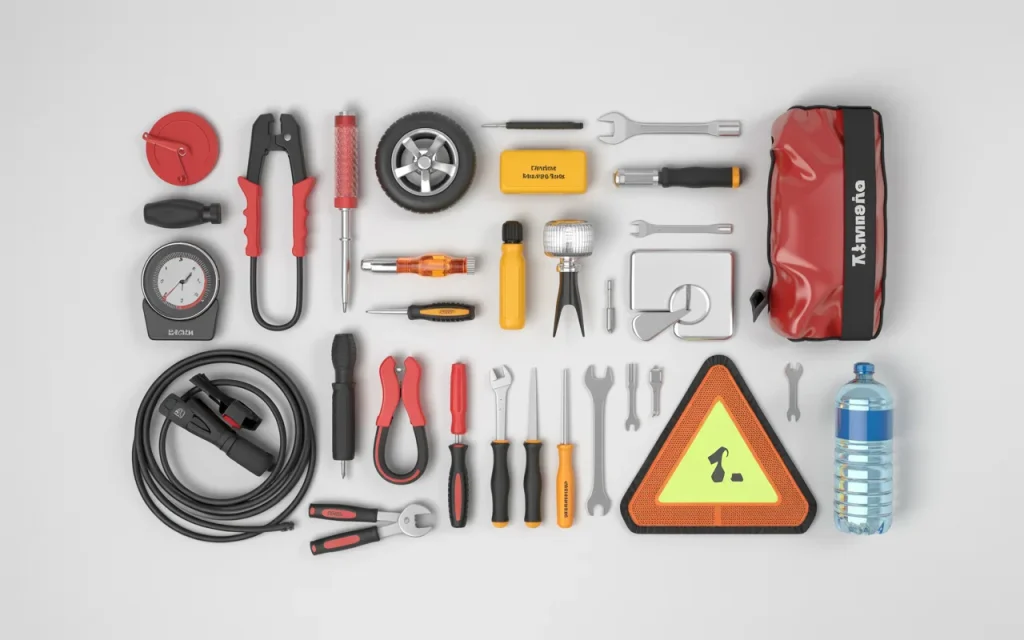
Basic Tools You Must Include
Every kit needs a set of basic tools. These items help you handle minor repairs and adjustments. You do not need a full garage worth of equipment. Just a few reliable pieces will cover most situations.
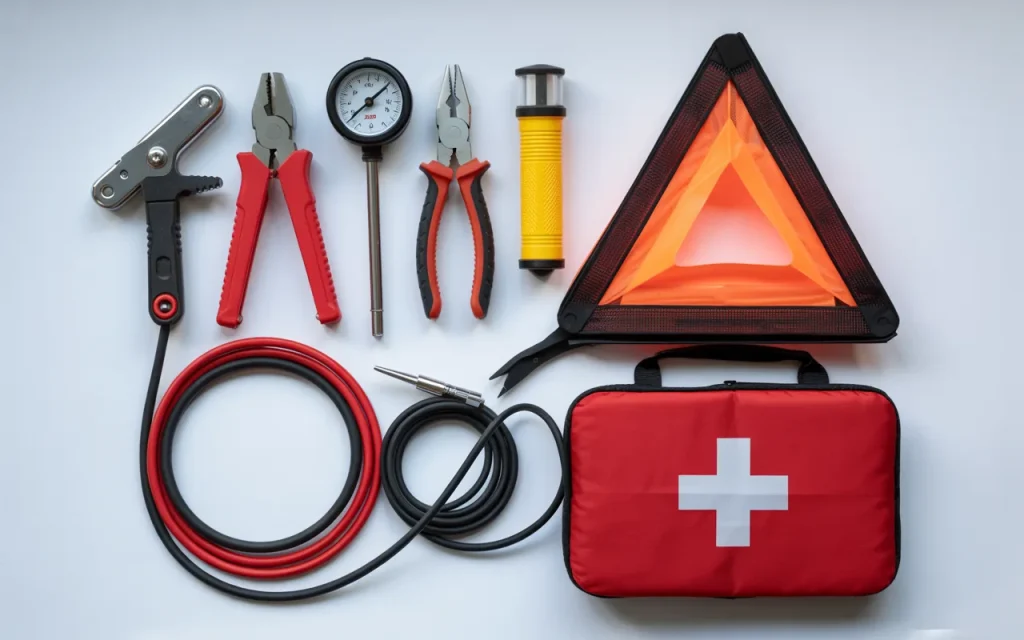
Essential Hand Tools
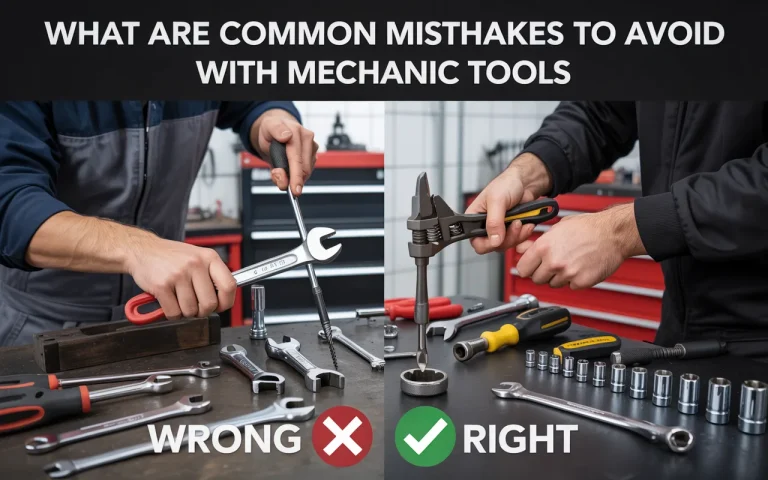
Start with a good multi-tool or a basic tool set. Include a pair of pliers, a screwdriver with multiple heads, and an adjustable wrench. These handle many small tasks like tightening a loose battery cable or removing a screw.
Add a utility knife for cutting seat belts, rope, or packaging. A small hammer can be useful for tapping things into place or breaking glass in an extreme emergency. Keep these tools in a sturdy pouch so they stay organized.
Tools for Tire Issues
Tire problems are the most common roadside issue. Make sure you have a working jack and a lug wrench that fits your vehicle. Check that the jack is stable and the wrench gives you enough leverage.
“A surprising number of drivers have a jack but cannot find the handle or do not know where the jack point is on their car. Check these things before you need them.” – Patricia Nguyen, Roadside Assistance Technician
Include a tire pressure gauge so you can check if a tire is low before it goes completely flat. A can of tire sealant can fix small punctures temporarily, but remember it is a short-term fix only.
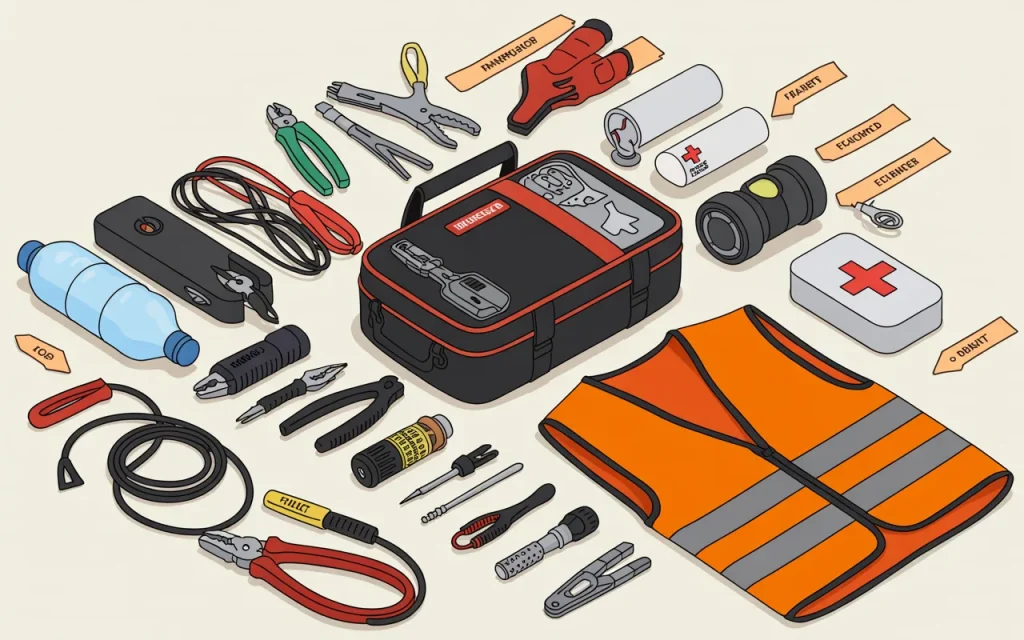
Safety Items to Protect You and Others
Safety should be your top priority when stopped on the road. Your kit needs items that make you visible and protect you from traffic and weather.
Visibility Gear
Pack at least three reflective warning triangles or road flares. Place them behind your vehicle to alert oncoming traffic. The rule of thumb is one right behind your car, one about 100 feet back, and one about 200 feet back on highways.
A bright flashlight with extra batteries is non-negotiable. Choose one that is waterproof and has a strobe function for emergencies. A reflective vest makes you much easier to see, especially at night or in bad weather.
Personal Protection
Keep a pair of heavy-duty work gloves in your kit. They protect your hands from sharp metal, hot engine parts, and broken glass. Safety glasses or goggles shield your eyes from debris when you are working under the hood or changing a tire.
A basic first aid kit belongs in every vehicle. Look for one with bandages, antiseptic wipes, gauze, medical tape, and scissors. Add any personal medications you might need if you are stuck for several hours.
Vehicle-Specific Items to Add
Every vehicle has different needs. Think about what your particular car requires and add items accordingly.
For Older Vehicles
Older cars are more likely to have belt or hose issues. Carry spare belts and hoses if you know how to install them. A roll of duct tape and a tube of silicone sealant can patch things temporarily until you reach a repair shop.
Keep a quart of oil, a gallon of coolant, and some transmission fluid in your trunk. Check these fluids regularly and replace them if they freeze or degrade.
For Modern Vehicles
Newer cars often have sensors and electronics that can be affected by battery issues. A portable jump starter is a great investment. These small devices can start your car without needing another vehicle. Many also include USB ports for charging phones.
“Having a portable jump starter changed how I feel about long drives. It is small, easy to use, and gives me peace of mind that I will not get stranded with a dead battery.” – David Chen, Long-Distance Driver
Include a basic OBD-II code reader if you want to understand why your check engine light is on. These affordable devices tell you what the computer in your car is detecting.
Comfort and Survival Supplies
Sometimes help takes a while to arrive. Being stuck for hours is uncomfortable, but it can also become dangerous in extreme weather.
Weather Protection
Pack a space blanket or an old wool blanket. Space blankets are tiny and reflect body heat. Wool blankets keep you warm even if they get wet. Add a large trash bag or poncho to stay dry in rain.
Keep a hat and gloves in your kit during winter months. In summer, add a wide-brimmed hat and sunscreen. These small items make a huge difference in comfort while you wait.
Food and Water
Store at least one liter of water per person in your vehicle. Rotate it out every few months so it stays fresh. Non-perishable snacks like granola bars, nuts, or crackers give you energy. Avoid chocolate or anything that melts in heat.
A small pack of wet wipes and hand sanitizer helps you clean up after working on your vehicle. Toilet paper in a sealed bag is something you will appreciate if you are stuck for a long time.
Creating Your Kit Storage System
How you store your items matters just as much as what you put in your kit. Disorganized gear is hard to use when you are stressed and in a hurry.
Choosing the Right Container
A plastic tote with a secure lid works well for most people. It keeps everything dry and contained. Look for one that fits in your trunk without sliding around. A backpack-style bag is another good option because it is portable and easy to carry.
Use smaller pouches or bags inside your main container to group similar items. Keep tools together, safety gear together, and survival supplies together. This makes finding what you need much faster.
Table 1: Recommended Kit Storage Options
| Container Type | Pros | Cons |
|---|---|---|
| Plastic Tote | Waterproof, stackable, inexpensive | Takes up space, can slide around |
| Backpack | Portable, easy to carry, organized | Less weather-resistant |
| Trunk Organizer | Fits vehicle shape, multiple compartments | May not seal completely |
| Soft-Sided Bag | Flexible, fits in small spaces | Not waterproof, less durable |
Label your container clearly so family members know what it is. Tell everyone who drives your vehicle where the kit is stored and what is inside.
Maintenance and Rotation Schedule
Putting a kit together is only the first step. You need to maintain it so everything works when you need it.
Check Every Three Months
Make it a habit to check your kit when you change your clocks for daylight saving time. Inspect flashlights and battery packs to ensure they hold a charge. Replace any batteries that are weak or corroded.
Look at food and water expiration dates. Swap out anything that is getting close to expiring. Check first aid supplies and replace anything you have used or that is out of date.
Seasonal Adjustments
Your kit needs change with the seasons. In winter, add an ice scraper, a small shovel, and cat litter or sand for traction. Pack extra warm layers and hand warmers. In summer, add more water, sunscreen, and insect repellent.
Check your spare tire pressure and jack operation at least twice a year. Make sure all parts are there and working smoothly.
What to Leave Out of Your Kit
Knowing what not to include is just as important as knowing what to put in. Some items cause more problems than they solve.
Avoid candles or open flames inside your vehicle. They are fire hazards and produce carbon monoxide. Stick to flashlights and battery-powered light sources.
Do not store aerosol cans where temperatures get extremely hot or cold. They can burst and damage other items or create a mess. Keep flammable items away from your kit entirely.
Skip the cheap tools that break the first time you use them. A broken tool when you are stuck on the highway is worse than having no tool at all. Spend a little more on items that will actually work.
Table 2: Quick Checklist for Your Kit
| Category | Essential Items | Nice to Have |
|---|---|---|
| Tools | Multi-tool, pliers, screwdriver, wrench | Socket set, hammer, zip ties |
| Tire Repair | Jack, lug wrench, pressure gauge | Sealant, portable air compressor |
| Safety | Triangles, flashlight, vest, gloves | Road flares, strobe light |
| First Aid | Bandages, wipes, tape, scissors | Pain relievers,急救手册 |
| Survival | Water, snacks, blanket, poncho | Hand warmers,充电宝 |
| Vehicle Specific | Fluids, duct tape, jumper cables | Jump starter, code reader |
Keep this checklist in your phone or glove box. Use it when you update your kit so you do not forget anything important.
Putting It All Together
Now you have a list of what you need and how to store it. Here is a simple step-by-step process to assemble a roadside emergency tool kit that works for you.
Start by gathering everything you already have around the house. Look for tools, flashlights, and first aid supplies you can repurpose. Make a list of what is missing.
Shop for the remaining items over a week or two so you do not feel rushed. Buy quality where it matters most, like jacks, jumpers, and flashlights. For things like bandages and snacks, basic options are fine.
Pack your container in a logical order. Put heavy items at the bottom and things you might need quickly near the top. Group similar items together in smaller bags.
Show your family where the kit is and explain what each item does. Let them practice using the jack and changing a tire in a safe place. Confidence comes from knowing how to use your tools.
“Teaching my teenage daughter how to use everything in her kit was the best parenting decision I made. She has never needed it, but she drives with real confidence now.” – Robert Garcia, Driving School Owner
Keep your kit in the same spot all the time. Do not borrow items from it for other projects. If you take something out, put it back as soon as you are done.
Frequently Asked Questions
How often should I update my roadside emergency kit?
Check your kit every three months. Replace expired food, water, and medications. Test batteries and recharge portable power packs. Adjust seasonal items as weather changes.
What is the most important item in a roadside kit?
A good flashlight and a way to call for help are the most critical items. After that, basic tools and safety triangles keep you safe while you address the problem.
Can I just buy a pre-made kit instead of making my own?
You can, but pre-made kits often contain low-quality items or lack important pieces. If you buy one, plan to add your own tools, a better jack, and personal items to make it complete.
How do I know what size jack and wrench I need?
Check your vehicle owner’s manual. It tells you the correct jack type and lifting points. Make sure your lug wrench fits the lug nuts on your specific vehicle.
What should I do if I have to stop on a busy highway?
Turn on your hazard lights. Get as far off the road as possible. Place warning triangles behind you. Stay inside your vehicle with your seatbelt on if traffic is heavy and you are in a safe spot. Call for help and wait for assistance.
Is it safe to store water in my car all year round?
Water is safe to store, but you need to rotate it. In summer, heat can cause plastic bottles to leach chemicals. In winter, water freezes and can burst containers. Use insulated containers or rotate water every few months.
Do I really need a first aid kit if I have a phone?
Yes. A first aid kit lets you treat injuries immediately. You cannot stop bleeding or clean a wound with a phone. Basic medical supplies save time and prevent small injuries from getting worse.
Conclusion
Learning how to assemble a roadside emergency tool kit is one of those simple tasks that pays off in a big way. It does not take much time or money, but it gives you real control over unexpected situations. You become the person who can handle a flat tire, jump a dead battery, or stay safe until help arrives.
Start with the basics and build from there. Pay attention to what your specific vehicle needs and what weather you drive in most often. Check your kit regularly and keep it organized. Share what you learn with other drivers in your life.
The best roadside kit is the one you actually have in your car, that you know how to use, and that fits your personal needs. Take an hour this weekend to put yours together. You will feel more confident every time you get behind the wheel, and that confidence makes every drive better.